

Article by
Jake Blasco, SHSS, B-2 Licensed Contractor
Jake Blasco is a Senior Home Safety Specialist® (SHSS), B-2 Licensed Residential Remodeling Contractor, and Grab Bar Specialist serving homeowners throughout Southern California. He specializes in aging-in-place modifications, grab bar installation, bathroom safety upgrades, accessibility remodeling, fall prevention solutions, and ADA-inspired home modifications. Through Blueprint Kitchen & Bath Design Studio, Jake helps seniors, veterans, and individuals with mobility challenges remain safe, independent, and comfortable in their homes. His expertise includes bathroom safety assessments, walk-in shower conversions, accessible design, railings, ramps, and other home accessibility solutions that improve quality of life while supporting long-term independence.
What if your home could be the most effective tool in your recovery kit, providing clinical safety without sacrificing the comfort and style of your living space? Medical professionals increasingly recommend recovering at home rather than in a rehabilitation facility, as studies show it often leads to faster results and a lower risk of complications. However, the transition requires more than just a walker and a prescription. Strategic home modification after hip replacement is the key to maintaining your physical autonomy while adhering to strict post-operative safety protocols. It's about creating a space where you can move with confidence rather than caution.
We understand that the thought of "medicalizing" your house can be daunting. You want to follow your surgeon's hip precautions and prevent falls, but you also want to keep the home you love looking like a home. This guide will show you how to transform your environment into a safe, accessible recovery space that supports your mobility and prevents accidents. We will walk through essential upgrades like grab bar installation and doorway widening, explaining how these practical changes provide peace of mind and long-term value for your lifestyle.
Key Takeaways
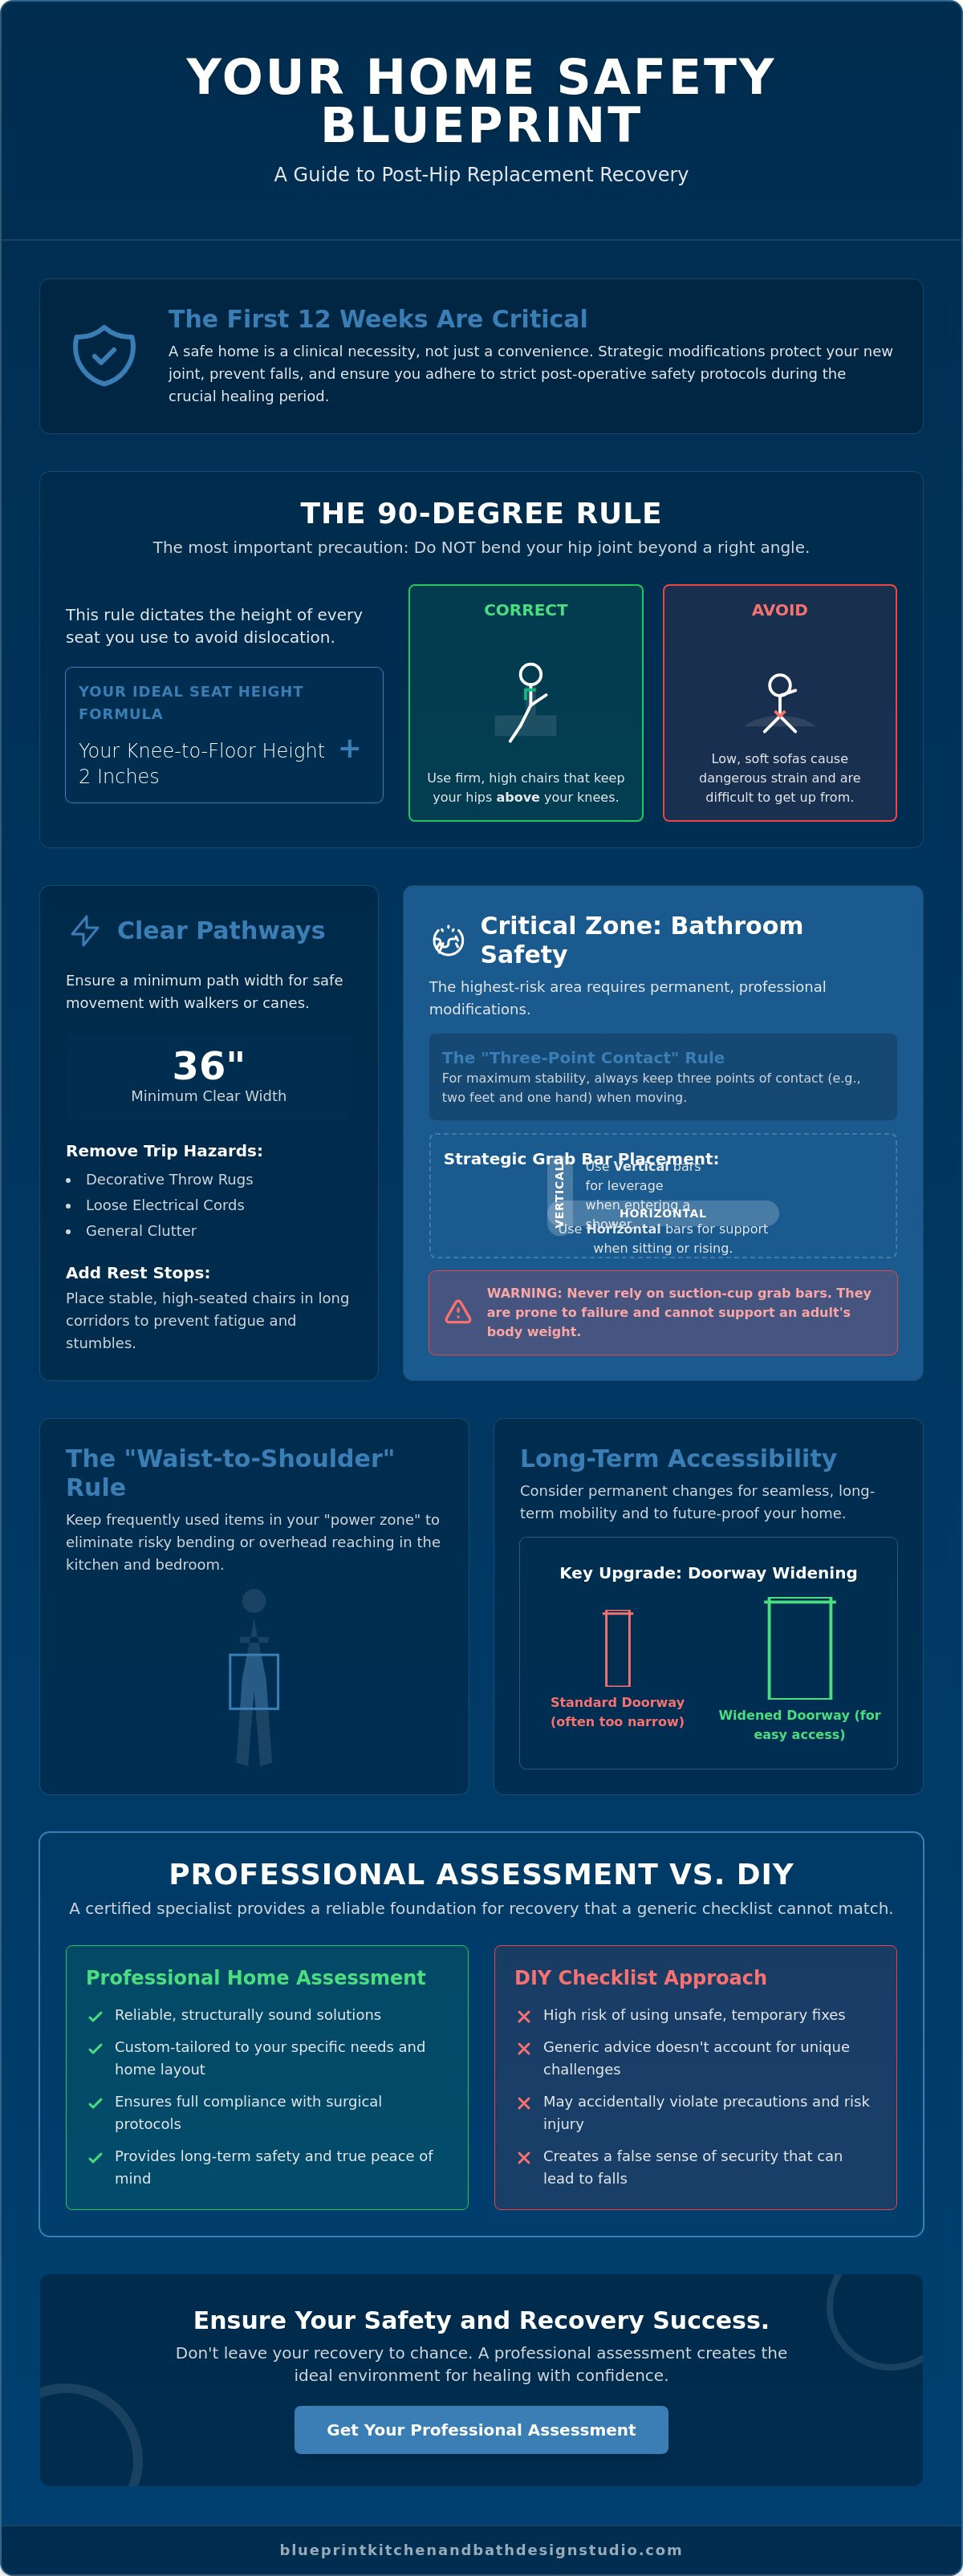
- Understand how the "90-degree rule" dictates furniture height and room layout to protect your new joint during the critical first 12 weeks of healing.
- Prioritize professional home modification after hip replacement in high-risk zones like the bathroom to ensure stability and prevent dangerous falls.
- Implement the "Waist-to-Shoulder" storage rule in your kitchen and bedroom to eliminate the need for risky bending or overhead reaching.
- Evaluate permanent structural changes, such as doorway widening, to provide seamless accessibility for walkers and long-term mobility.
- Learn why a professional home safety assessment from a certified specialist provides a more reliable foundation for recovery than a standard DIY checklist.
Understanding Hip Precautions and Your Home Environment
Successful recovery begins the moment you leave the hospital, but your house isn't always naturally prepared for your new physical limitations. Gaining a foundational Understanding Hip Replacement Surgery helps you realize that the first six to twelve weeks are a critical period for joint stability. During this time, the soft tissues around your prosthesis are healing, and specific movements can increase the risk of dislocation. A home that hasn't been adapted to these needs can accidentally compromise your surgeon's hard work.
Effective home modification after hip replacement isn't just about convenience; it's a clinical necessity that protects your surgical outcome. Many standard California home layouts, with their open floor plans and plush furnishings, present hidden "danger zones" that can lead to accidental non-compliance with post-op orders. Temporary fixes, like piling pillows on a chair, often fail to meet surgical safety standards because they lack the structural integrity required to support your weight safely as you move.
To better understand how to prepare your space, watch this helpful video:
The 90-Degree Rule: Why Seat Height Matters
Your surgeon will likely mandate the "90-degree rule," which means you cannot bend your hip joint beyond a right angle. This rule dictates every piece of furniture you use. To calculate your ideal seat height, measure from the back of your knee to the floor while standing; your chair seat should be at least two inches higher than that measurement. Low, soft sofas are a primary cause of post-op falls because they lack the firm support needed to push yourself up without straining the joint. While furniture risers can help in the short term, they don't replace the security of a professionally assessed environment.
Navigation Paths and Mobility Aids
Standard hallways often feel much narrower once you're using a walker or cane. You should aim for a "clear width" of at least 36 inches to move comfortably without catching your mobility aid on doorframes or furniture. Removing trip hazards like decorative throw rugs and loose electrical cords is a non-negotiable step in your home modification after hip replacement. If your home has long corridors or a large open-concept layout, placing a stable, high-seated chair halfway through acts as a vital rest stop. These stops prevent the sudden fatigue that often leads to stumbles during the early days of your recovery.
Bathroom Safety Upgrades: The Critical Recovery Zone
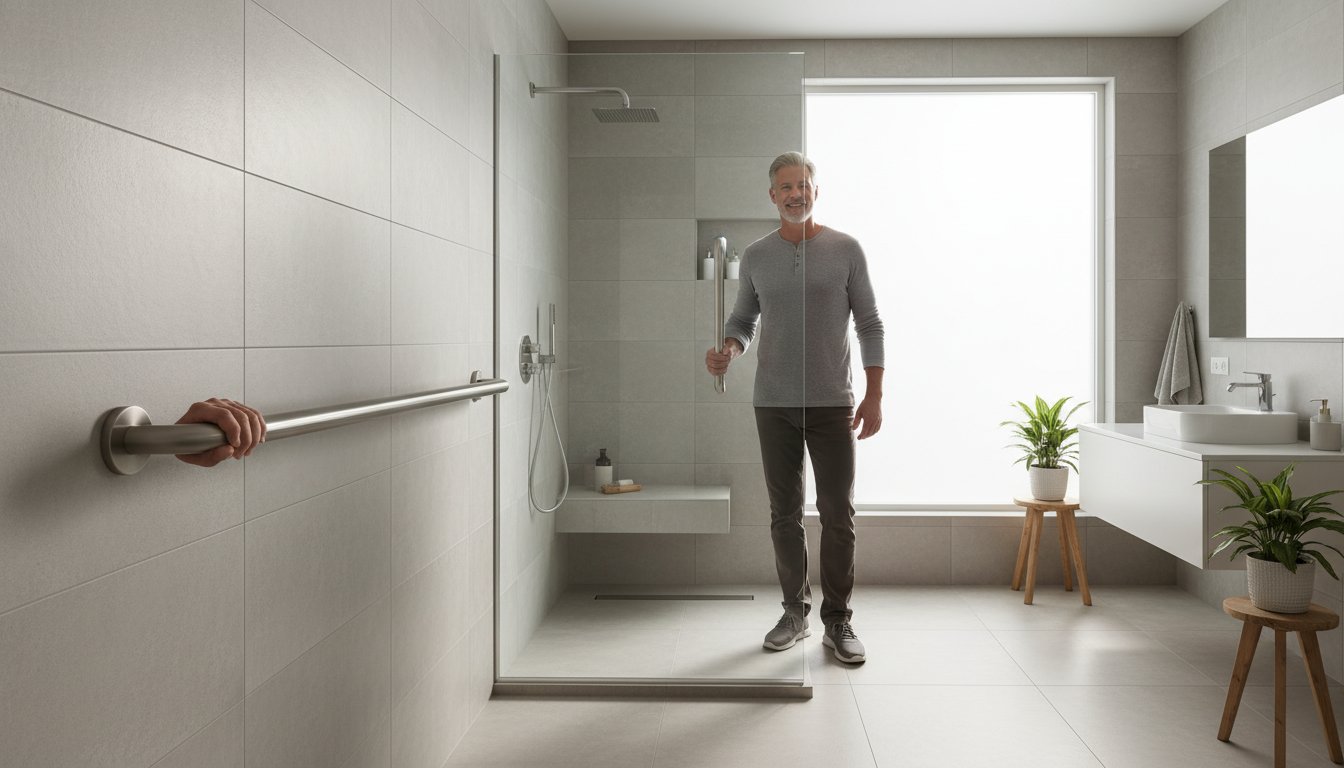
The bathroom is statistically the most high-risk area in any household, but for a patient recovering from surgery, it's a zone that requires meticulous planning. Wet surfaces, tight spaces, and the physical demand of postural changes create a perfect storm for potential injury. While many patients rely on temporary plastic equipment, a permanent home modification after hip replacement offers a level of structural stability that medical-grade plastic simply cannot match. When Preparing Your Home for Recovery, focusing on fixed architectural improvements ensures your independence isn't dependent on a suction cup or a wobbly seat. It's about moving from a "temporary fix" mindset to a "long-term safety" strategy that protects your well-being for years to come.
Strategic Grab Bar Placement for Hip Stability
Maintaining balance during transitions requires a "Three-Point Contact" rule. This principle suggests you should always have three points of stability, such as two feet and one hand or two hands and one foot, anchored at all times. Vertical bars are typically best for leverage when stepping into a shower, while horizontal bars provide the necessary support when rising from a seated position. We strongly advise against suction-cup models, as they are prone to failure on textured tile and cannot reliably support the full body weight of an adult. Instead, professional grab bar installation ensures that hardware is anchored directly into the wall studs. This provides the unyielding security required to prevent a catastrophic fall during the early stages of healing.
Curbless Showers and Slip-Resistant Surfaces
Eliminating the "step-over" risk is a primary goal for anyone undergoing a hip procedure. A curbless shower provides a zero-entry path that removes the need to lift your surgical leg over a high tub wall or shower threshold. This modification is the gold standard for post-surgical recovery, as it allows for a seamless transition using a walker if necessary. When paired with slip-resistant flooring that meets ADA standards, the risk of a hydroplaning fall is virtually eliminated. Modern materials allow for beautiful, high-end aesthetics that don't look industrial but provide the grip needed when the floor is wet.
In addition to flooring, a handheld showerhead is an essential tool. It allows you to remain seated on a shower bench while maintaining the 90-degree rule, as you don't have to reach or twist to stay under a fixed stream. Finally, upgrading to a comfort-height toilet is a vital part of your home modification after hip replacement. Standard toilets are often too low, forcing the hip into a dangerous degree of flexion. A higher seat height ensures you can sit and stand with ease. If you're looking for a solution that blends clinical safety with modern design, exploring a curbless shower installation can provide lasting peace of mind well beyond your recovery period.
Kitchen and Bedroom Modifications for Self-Sufficiency
Self-sufficiency is the ultimate goal of any successful recovery. While the bathroom requires immediate safety hardware, your kitchen and bedroom require ergonomic restructuring to support your daily routine. This stage of home modification after hip replacement focuses on minimizing physical strain during common tasks. It ensures you can prepare a meal or rest without risking a joint dislocation. By organizing these spaces strategically, you reduce the need for constant assistance and regain your confidence faster.
Standard home designs often force us to bend low for heavy pots or reach high for glassware. For a recovering patient, these movements are dangerous. According to the American Academy of Orthopaedic Surgeons, Preparing Your Home for Hip Replacement Recovery involves making these functional adjustments before you even head to the hospital. The "Waist-to-Shoulder" rule is a simple but effective strategy to address this. It involves moving all frequently used items into the zone between your waist and shoulders. This reorganization prevents you from breaking the 90-degree hip flexion rule while performing basic chores.
Eronomic Kitchen Organization
Most kitchens are designed for people who can easily squat or stretch. When you're managing a new hip joint, these common tasks become hazards. By implementing accessible kitchen design principles, you can maintain your independence. This includes installing pull-out shelving that brings heavy items directly to your reach. A rolling kitchen cart is also a safer alternative to carrying a hot plate while using a walker. It allows you to keep both hands on your mobility aid while moving items across the room. These small changes create a workflow that respects your physical limitations without stopping your progress.
The Safe Bedroom Sanctuary
Your bedroom should function as a recovery hub where everything you need is within arm's reach. Bed height is a critical factor that many families overlook. When you're sitting on the edge of the mattress, your feet must be flat on the floor. If the bed is too high, you'll struggle to get in safely. If it's too low, you'll break the 90-degree rule when trying to stand. A firm mattress provides the necessary resistance to help you shift positions without straining the surgical site. It prevents the "sinking" feeling that makes it difficult to gain leverage when waking up.
Nighttime navigation is equally important for a safe home modification after hip replacement. Ensure there's a clear, well-lit path from the bed to the bathroom to prevent stumbles in the dark. Installing bedside lighting that is reachable without twisting your torso is vital. Sudden rotations can be just as harmful as deep bending during the first few weeks of healing. Keeping your medications, water, and phone on a stable nightstand at mattress height ensures you don't have to reach or lunge for essentials during the night.
Structural Changes for Long-Term Accessibility
While reorganizing a pantry or adjusting bed height offers immediate relief, some obstacles require a more permanent solution. In many Southern California ranch-style homes, narrow hallways and tight door clearances become immediate barriers to mobility. A comprehensive home modification after hip replacement often involves addressing these structural limits to ensure you can move through every room without friction. These changes shift the focus from a temporary recovery period to a lifestyle of long-term independence. Investing in aging-in-place remodeling in Redlands ensures your home remains a sanctuary rather than a series of hazards as your needs evolve.
Doorway Widening and Accessible Entry
Standard interior doors in older homes are frequently only 28 inches wide. While this might suffice for a person walking unaided, it often fails the "walker test." A standard walker requires significant clearance to prevent the user from scraping their knuckles or catching the frame. You can use swing-clear hinges to gain an extra inch or two by moving the door entirely out of the opening. However, full structural widening to 32 or 36 inches is the most reliable way to accommodate both standard and bariatric walkers. Additionally, installing low-profile thresholds is vital. Even a half-inch rise can catch a toe or a walker wheel, leading to a loss of balance. These seamless transitions are a hallmark of a professional home modification after hip replacement, as they eliminate the small stumbles that lead to major setbacks.
Home Access Ramps and Exterior Safety
Your recovery doesn't stop at the front door. Evaluating the entry to your home is a critical step in a safe recovery plan. Steps, porches, and uneven walkways are significant risks during the first few months of healing. If your home has even a single step, a home access ramp may be necessary to ensure you can leave and enter safely for follow-up appointments. Professional design is essential here because a ramp that is too steep is just as dangerous as the stairs it replaces. We follow the 1:12 slope ratio, which means for every inch of vertical rise, there must be 12 inches of ramp length. This ensures a gentle incline that is manageable with a walker or cane.
When evaluating your home's exterior, consider these three key areas:
- The stability and height of porch steps and the condition of existing handrails.
- The smoothness of transitions from the driveway to the main walkway.
- The presence of adequate lighting for evening arrivals to prevent missteps.
For existing exterior stairs that don't require a full ramp, adding dual handrails provides the balanced support needed to navigate changes in elevation safely. If you're ready to remove the structural barriers in your home, consider a professional doorway widening service to ensure every room is fully accessible and safe for your return.
The Professional Assessment: Preparing for Surgery in 2026
Planning your return home requires the same level of precision as the surgical procedure itself. While a DIY checklist might cover the basics, it often misses the subtle environmental triggers that lead to accidental falls. A professional home safety assessment provides a comprehensive roadmap for your recovery. It ensures that every home modification after hip replacement is tailored to your specific mobility level and your surgeon's unique post-operative protocols. Starting this process four to six weeks before your surgery date allows ample time for structural changes and hardware installations. This proactive approach eliminates the stress of living in a construction zone while you're trying to heal.
A SHSS Certified Specialist in the Inland Empire acts as a bridge between your physical therapist's clinical goals and your home's physical layout. They understand that recovery isn't a one-size-fits-all process. By evaluating your environment through a clinical lens, they can suggest improvements that a general contractor might overlook. This professional oversight provides the calm authority and peace of mind you need to focus entirely on your physical rehabilitation once you return from the hospital.
What Happens During a Home Safety Assessment?
An expert assessment goes beyond identifying obvious trip hazards like loose rugs. We evaluate lighting levels to ensure high-contrast visibility during nighttime bathroom trips and test floor friction to prevent slips on polished surfaces. We also measure your specific reach ranges to place storage and safety hardware exactly where your body needs them. This process identifies "hidden" hazards, such as a "phantom" step between rooms or a loose railing that feels secure to a healthy person but fails under the weight of someone using a walker for balance. The result is a prioritized list of modifications that ensures your home supports your new joint perfectly.
Choosing a Specialized Contractor in Redlands
Selecting the right partner for your project is just as important as the modifications themselves. General contractors often miss the nuances of grab bar installation for seniors, such as the exact height and angle required to support a patient following hip-specific weight-bearing restrictions. You need a design studio that understands both the medical necessity of these upgrades and the aesthetic desire for a beautiful, high-end home. When you work with a specialist, they can coordinate the timing of your home modification after hip replacement to ensure your environment is "move-in ready" the moment you're discharged. This seamless integration of safety and style ensures your home remains a place of dignity and comfort throughout your recovery journey.
Securing Your Independence and Peace of Mind
Transforming your home into a recovery sanctuary is a vital step in your journey toward full mobility. By prioritizing permanent structural changes like doorway widening and curbless shower installations, you move beyond temporary fixes to create a space that supports your long-term autonomy. A strategic home modification after hip replacement ensures that your environment adheres to clinical safety standards while maintaining the aesthetic beauty of your residence. This proactive approach allows you to focus on your physical rehabilitation without the constant anxiety of environmental hazards.
As a SHSS Certified Senior Home Safety and Grab Bar Specialist, Blueprint Kitchen and Bath Design Studio specializes in blending high-end design with the clinical precision required for aging-in-place remodeling. We have served homeowners across Redlands and the Inland Empire for years; our team provides the specialized expertise needed to bridge the gap between medical necessity and domestic comfort. Schedule your professional Home Safety Assessment with Blueprint Kitchen and Bath Design Studio today. You deserve a home that empowers your recovery and protects your future. With the right preparations, you can return from surgery with confidence and focus entirely on your healing.
Frequently Asked Questions
How soon should I start home modifications before my hip replacement?
You should ideally begin the planning and installation process 4 to 6 weeks before your scheduled surgery. This timeline allows for professional assessments and any necessary structural changes, such as doorway widening or slip-resistant flooring installation. Having these modifications completed early ensures you can focus entirely on your pre-operative exercises and mental preparation without the stress of a pending construction project.
Do I really need a raised toilet seat if I have a "comfort height" toilet?
Even with a comfort height toilet, which typically measures 17 to 19 inches, you may still require a raised seat to comply with the 90-degree rule. The goal is to ensure your hips remain higher than your knees while seated. For taller individuals, a comfort height model alone might not provide enough elevation to prevent excessive hip flexion during the early, most vulnerable stages of your recovery.
Are grab bars covered by insurance or Medicare for hip surgery recovery?
Original Medicare and most private insurance plans generally do not cover the cost of permanent grab bar installation, as they are often classified as home improvements rather than durable medical equipment (DME). While Medicare Part B typically covers 80% of the approved amount for prescribed DME like walkers or commode chairs, modifications to the home's structure are usually an out-of-pocket investment in your long-term safety.
Can I widen my doorways without a full home renovation?
Yes, you can often gain the necessary clearance for a walker by installing swing-clear hinges rather than performing a full structural widening. These specialized hinges allow the door to swing completely out of the frame, adding approximately 1.5 to 2 inches of usable width. This is a cost-effective home modification after hip replacement that provides immediate accessibility for mobility aids without the need for major wall demolition.
What is the most common cause of falls at home after a hip replacement?
The most common causes of post-operative falls are tripping over household hazards like throw rugs and slipping on wet bathroom surfaces. Sudden fatigue during the first few weeks can also lead to stumbles; this is why placing "rest stops" or stable chairs along frequent paths is a vital part of a safe recovery plan. Removing all loose cords and ensuring high-contrast lighting can significantly reduce these environmental risks.
How do I know if my shower is safe enough for post-op use?
A safe shower for post-op use must have a low or zero-entry threshold, slip-resistant flooring, and professionally anchored grab bars. If you have to step over a high tub wall, your shower is likely unsafe for the initial 6 to 12 weeks of healing. A professional home safety assessment can determine if your current setup meets the weight-bearing and stability requirements mandated by your surgical team.
Will home safety modifications decrease the resale value of my home?
High-quality home safety modifications often increase a property's resale value by incorporating universal design principles that appeal to a broad demographic. Modern home modification after hip replacement, such as curbless showers and accessible kitchen designs, are increasingly viewed as premium lifestyle upgrades rather than clinical necessities. These features add longevity and functionality to the home, making it more attractive to buyers planning for their own future.
What is the 90-degree rule, and how does it affect my furniture choices?
The 90-degree rule is a surgical precaution that prohibits you from bending your hip joint beyond a right angle. This affects your furniture choices because low, soft chairs or sofas will force your hips into a deep bend that could lead to dislocation. You'll need firm, high-seated furniture that allows you to keep your knees lower than your hips at all times during the first few months of your recovery journey.


